What Goes On Inside Your Water Heater?

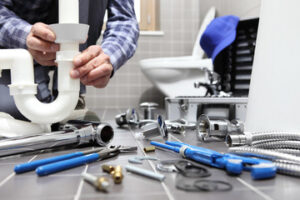
Plumbing systems are complex networks of pipes that carry water and waste. They require regular maintenance to function properly. Plumbers use a variety of tools and techniques to perform their jobs. They also must follow strict building codes when installing or repairing plumbing fixtures. Contact Plumbing Express, Inc. for professional help.

Water Heater

Residential plumbing systems typically consist of two basic components: the water supply system and the drain system. The water supply system includes small pipes under pressure, which deliver water to fixtures at a high rate.

Plumbing is a highly rewarding career, especially for those who have the right qualifications. Plumbers are responsible for installing, repairing, and maintaining the pipes and fixtures that facilitate water supply, drainage, and waste disposal in residential, commercial, and industrial settings. This vital work ensures a safe and clean environment for occupants, while protecting the integrity of the building’s structure.

Qualifications for becoming a plumber vary by region, but most jurisdictions require at least a high school diploma or equivalent and a vocational training program. Those who wish to advance in the field may pursue additional certifications, such as in green plumbing practices or working with specific types of equipment. Plumbers must also be licensed by their local authorities in order to practice in the trade.

The licensing process can vary significantly by region, but it typically involves passing an exam and meeting minimum experience requirements. In addition, some states and cities have their own unique licensing requirements, such as continuing education or backflow testing certification. New York City, for example, requires that all master plumbers complete seven hours of continuing education every year in order to renew their licenses.

Once licensed, plumbers can work on both new construction and existing systems. In the former case, they will plan and lay out the pipe network according to the building’s design, ensuring that it meets local regulations regarding water pressure and drainage. Once the piping is in place, they can install sinks, toilets, tubs, and other fixtures. They will also connect the internal piping to external water and waste disposal systems, and test for leaks and other issues.

In existing buildings, plumbers will maintain and repair the current system. This can involve removing old fixtures and replacing them with new ones, fixing leaks, and conducting inspections to ensure that the building is up to code. They will also be responsible for backflow prevention, which is a key aspect of keeping contaminated water out of clean drinking water supplies. The CDC reports that backflow causes 7.15 million illnesses each year, so it’s important that plumbers are certified in this area of their work.

Water heaters

Water heaters are a key part of the modern home and help us get the job done, from washing clothes to cleaning dishes. But what goes on inside that simple box that makes your morning shower so satisfying? Here’s a look at the ingenious design on the inside that works together to make hot water possible.

Traditional water heaters use either fossil fuel (natural gas, liquefied petroleum gas or oil) or electricity to heat the water. The electricity can come directly from the fossil fuels, or it may come from other sources such as wind power, solar energy, district heating using waste heat from electricity generation or industrial processes, or from alternative sources such as geothermal heating.

The tank of a conventional water heater is usually made from heavy steel and insulated with polyurethane foam or another insulating material. It has a cold water inlet pipe, a hot water outlet pipe and a safety valve that is capped with metal or plastic overflow caps to prevent spills. The tank also has a dip tube that allows the hottest water to exit from the top of the tank. This is because hot water rises above cold water in a tank.

Depending on the type of tank used, water heaters can have a maximum capacity of 40 to 60 gallons (227 to 151 liters) at 50 to 100 pounds per square inch (PSI). Whether they are fuel- or electricity-based, most have an efficiency rating of about 95%.

Most homes have an existing electrical connection running to the location of the water heater. If not, an electrician can add a circuit. If the water heater is gas-based, a plumber must install the gas lines and vent the tank through a wall.

ENERGY STAR qualified water heaters have higher efficiency ratings than standard models. They can be electric or fuel-based and have a lower environmental impact, especially when using district heating using low carbon emissions sources such as the exhaust from electricity generation, and when used in conjunction with solar panels. Generally, these water heaters are more expensive to purchase and install than standard models, but can save money in the long run because of the lower operating costs.

Water softeners

Water softeners reduce the amount of hardness minerals in your household water supply. This removes the calcium and magnesium ions that create limescale, destroy plumbing fixtures, decrease appliance lifespans, limit the effectiveness of soaps and detergents, and make your skin and hair feel dry. In addition, many people find that water softeners help their clothes and dishes look brighter and feel softer, as well as smell fresher.

Unlike water filters that remove specific impurities from the water, such as chlorine and lead, water softeners do not affect the taste of your drinking water. The main component of a water softener is a mineral tank that holds a bed of resin beads. The water supply line feeds into the mineral tank, and the resin beads exchange calcium and magnesium ions for sodium ions. Once this process is complete, the water exits the mineral tank as softened water.

A control valve, power supply and brine tank are also required to operate the system. The control valve monitors the level of hardness minerals in the softened water and controls when the resin bed needs to be recharged with salt. The brine tank stores the salt solution used to regenerate the resin bed. Once the regeneration cycle is complete, the brine tank sucks the solution out of the mineral tank and into the drain, leaving behind the depleted resin beads.

The majority of water softeners use the ion exchange process to eliminate the unwanted hardness minerals from your household water. The ion exchange process involves passing water through columns of natural or synthetic aluminosilicates, which trade the hardness-producing ions for sodium ions. The exchangers are then flushed with water to rinse away the excess salt, returning them to service.

When selecting a water softener, be sure that it is rated for your household’s water usage and location. You don’t want to purchase a system that is too small, as it will not be effective, and an oversized system can cause problems with your water flow rate. For most households, a system with a 30,000-grain capacity is suitable, although it may be more economical to select a smaller, 18,000-grain model for single- or two-bathroom homes.

Backflow prevention devices

Backflow testing is a process that ensures your backflow prevention device is working properly. It’s a necessary step to protect your water supply and prevent dangerous contaminants from entering it. Water backflow can occur in many different ways, including a break in the main water line or when a fire hydrant is opened. Backflow prevention devices are designed to stop this from happening by keeping pressure changes from causing backflow.

There are several types of backflow prevention devices available, but the most popular is the reduced pressure zone (RP) assembly. This type of backflow prevention device is one of the safest and most dependable. It uses two check valves and a pressure differential release valve to separate the valves, which ensures that only clean water flows through the system. These valves are usually installed in areas where the risk of contaminated fluids is high, such as boilers and heat exchange equipment, industrial power washing and chemical cleaning equipment, and residential and commercial fire sprinkler systems.

The RP is also used when there’s not enough space to install an air gap backflow prevention device. It’s a popular choice for commercial buildings that are at high risk of contamination due to their plumbing configurations, such as restaurants and laundromats.

Backflow prevention devices are regulated by most governments. There are even some that require them to be tested annually. Failure to comply with these regulations can result in fines and even having your water shut off.

A backflow test is a quick and simple way to determine whether your backflow prevention device is functioning correctly. It is done by a backflow prevention specialist, and involves observing the flow of water in the reverse direction. The specialist will also inspect the piping for any potential problems and recommend any necessary repairs.

Backflow prevention devices are vital to the health and safety of everyone in your community. They can prevent dirty water from flowing into the municipal water supply, which could lead to serious diseases like dysentery and typhoid. They are also essential for preventing contamination from pesticides and fertilizers, as well as other harmful chemicals.

Understanding a Plumber’s Role: Duties and Responsibilities

Plumber Glendora CA works in a variety of settings, including homes, commercial and industrial buildings. They install plumbing systems and appliances such as toilets, sinks, water heaters, and dishwashers. They also inspect and test existing pipes, repair clogged drains and sewer lines, and repair or replace parts as needed.

Plumber

To be a plumber, you need physical strength and stamina as well as excellent manual dexterity to handle tools and parts. Other important skills include critical thinking and the ability to solve problems.

Whether the problem is a clogged drain or a broken water heater, plumbers diagnose issues to determine how to repair them. They use video cameras to inspect pipes, pressure gauges to test for leaks, and other specialized tools to identify problems. They also use their knowledge of plumbing codes and standards to ensure work is done correctly.

When it comes to sewer repairs, the plumber first needs to know where the lines are located. The plumber can mark the location with spray paint or by digging up part of the yard. They should also be aware of any below-ground obstacles such as electric dog fences, sprinkler systems, or utility lines. The plumber should also know if the line is shared with neighbors, and if so, get their permission before starting work.

When a sewer line is clogged, it can cause sewage to back up into drains and toilets. This can lead to health hazards and major property damage. If you notice foul odors coming from your drains or toilets, contact a professional immediately. The smells are caused by raw sewage, and it is important to have the line fixed as soon as possible. Depending on the severity of the issue, the plumber may need to dig up and replace part or all of the line. It is also possible that the pipe is too low and needs to be raised.

Repair

Whether it’s a leaky faucet or a broken water heater, plumbers repair or replace the parts that make up plumbing systems in homes and businesses. They use specialized equipment like video cameras to inspect pipes, pressure gauges to test for leaks, and other tools to identify issues and develop effective solutions.

One of the most important skills for a plumber is their ability to listen to their customers and understand their problems. This is especially true when it comes to sewer line problems, where clogs or breaks can cause serious health and safety hazards if not addressed quickly.

Sewer lines, which run from a home to the municipal sewer system or septic tank, can become clogged with debris or even completely break down, resulting in sewage backups and other costly repairs. If you suspect your sewer line is damaged, a plumber will start by running a camera through the pipes and marking their location on the surface with spray paint. This will help them locate any blockages or other problems, such as root infiltration.

If the pipe is cracked or collapsed, it will need to be replaced. This can be done with trenchless methods such as pipe bursting or cured-in-place pipe (CIPP), which avoid excavation and minimize disruption to the property. For smaller problems, a plumber may be able to use a drain cleaner or snake to clear out the clog and then repair the line with epoxy or other sealants.

Plumbers are also required to follow strict safety protocols when working with sewage. This includes wearing protective clothing and gloves, as well as using specialized tools to prevent exposure to bacteria and other contaminants. These precautions are necessary to ensure the safety of workers and the public, as well as preventing damage to the environment.

If you think your sewer line is clogged or damaged, call Harris Water Main & Sewer Contractors for fast, reliable service. We offer 24/7 emergency services to all of Brooklyn, Queens, Manhattan and the Bronx. Contact us today to schedule a consultation!

Replacement

Plumbing systems take away waste water, supply hot and cold water and regulate indoor climate through a network of pipes, valves and fixtures. Plumbers are skilled professionals who install, repair and maintain these essential systems in homes and businesses. Their broad skill set includes an understanding of the science behind water flow, knowledge of a variety of tools and materials and an in-depth understanding of building regulations.

Plumbers often collaborate with other professionals on construction projects to ensure that plumbing systems are integrated seamlessly into building designs and that all relevant regulations are met. They also provide customer service, advising customers on plumbing solutions and answering questions. In addition, they may work on emergency calls to fix burst pipes or clogged drains.

The plumbing industry is a fast-growing field with many opportunities for career progression. Some plumbers choose to become self-employed, allowing them to control their own working hours and gain greater financial independence. Others move into management roles or specialise in particular areas of plumbing such as drainage or heating.

While the job is challenging and often requires working at heights or in tight spaces, it offers excellent earning potential. Plumbers are in high demand and can command competitive hourly rates. They also have the option to establish their own plumbing companies, increasing their earnings potential even further.

Plumbers must have a strong interest in science and be good at problem-solving to excel in their careers. They need a high school diploma or equivalent and should consider taking some college courses to improve their qualifications. Many enter the profession through an apprenticeship program where they receive on-the-job training under a licensed journey plumber while earning a wage. Alternatively, some plumbers become qualified through an accredited vocational school or trade college. Once qualified, plumbers must renew their certifications regularly to stay up-to-date with industry changes and standards.

Maintenance

Plumbers maintain and repair the piping, fixtures, and appliances that facilitate water supply, waste removal, and heat production in homes and businesses. Their duties involve inspecting existing plumbing systems, testing for water pressure levels, locating and fixing leaks, and installing new pipes and fixtures. They also work with other construction professionals to ensure that plumbing systems are integrated seamlessly into building projects and meet all necessary standards and regulations.

To be successful in this role, plumbers must have a wide range of skills. They must be able to read and interpret blueprints and building codes, and have strong problem-solving abilities. They must also be able to communicate effectively with customers to understand their needs and provide advice on plumbing solutions. In addition, they must be comfortable working with a variety of tools, including hand tools and power tools such as wrenches and pipe cutters.

A plumber’s career typically begins with a vocational school or community college program, followed by an apprenticeship. Apprenticeships combine classroom instruction with paid on-the-job training under the supervision of a journeyman plumber. This type of program usually lasts four to five years and leads to a journeyman plumber certification.

Commercial plumbers focus on larger-scale plumbing systems found in office buildings, restaurants, factories, and other large structures. They use their knowledge of plumbing standards and regulations to design, install, and maintain these systems. They may specialize in specific types of systems, such as steam pipes or HVAC systems.

Service and repair plumbers are the troubleshooters of the plumbing world. They are called in when there is an issue with a customer’s plumbing system, such as a clogged drain or burst pipe. These plumbers must be able to identify the issue quickly and efficiently to minimize disruption to the customer’s daily routine. This type of plumber often works on an emergency basis, so they must be available around-the-clock.

Fence Installation – Choosing the Right Material and Style for Your Fence

Fence installation can add privacy to a home and increase property value. However, it can also be dangerous if not done properly.

Before beginning any fencing project, it is important to check local laws and building codes and discuss your plans with your neighbors. Click the https://rcfence1.com/ to learn more.

A fence is a great way to add privacy to your property. It can also deter trespassers, burglars, and wildlife. In addition, it can help keep pets and children inside the yard and reduce noise levels in urban or suburban environments. It can even define property boundaries and avoid disputes with neighbors. However, before you begin a fencing project, it’s important to understand the purpose of the fence and its intended aesthetic.

During the initial consultation, a professional installer will review your needs and preferences and offer advice about the best materials for the job. They will also check zoning laws and homeowners association regulations, where applicable. In some areas, it is mandatory to obtain a permit before beginning any work.

Before the construction begins, you’ll need to ensure the fence will not interfere with buried utilities. It’s important to contact the utility companies to get a location report before starting the construction. This will prevent the crew from accidentally digging into sewage or water pipes. You can either do this yourself or ask your fencing company to do it for you.

Once you’ve made sure that your fence won’t interfere with buried utilities, it’s time to start planning the layout. It’s a good idea to talk to your neighbors and let them know of your plans before you begin. This will give them the chance to voice any concerns and discuss the potential impact of the fence on their properties.

Another important consideration is the height of the fence. Many states have minimum and maximum height requirements, so you’ll need to know these before you decide on the exact size of your fence. Choosing the right height will ensure that you are in compliance with local regulations and that the fence doesn’t obstruct any buildings or signs.

Before the installation begins, you should remove or move any movable lawn furniture, flower pots, or kids’ toys. This will allow the crew to safely access your yard and install the fence without causing any damage.

Security

Many homeowners install fences for security purposes, such as keeping children and pets safe from traffic and predators. Fences can also be used to prevent trespassing and property theft. In addition, a well-designed and maintained fence can improve the aesthetic of your home’s landscape.

Before starting your fence installation project, it’s important to plan the layout and mark the boundaries of the site. This will ensure that the fence stays within your property lines and doesn’t encroach on the neighboring properties. It’s also a good idea to consult with the local building department to find out any restrictions or requirements that may apply to your project. You’ll also want to consider how high your fence will be, as this will have an impact on its cost and functionality.

A professional fence installer will conduct an initial consultation to discuss your needs and preferences. They’ll then offer advice on the best materials to use and check with your neighborhood or homeowner association for any specific requirements. In addition, they’ll obtain the necessary permits from the city or county offices. This will ensure that your new fence is constructed according to the city’s zoning laws.

Fences are highly visible structures that can be used to define and limit property lines, control access to swimming pools, and keep wildlife out of yards. Most communities have setback and height restrictions, which should be researched before starting a fencing project. If your property is in a historic district, you may need a permit from the Landmarks Preservation Commission to build a taller fence.

If you have the time and skill, installing a fence isn’t a hard task to do yourself. However, if you have limited time and experience, or aren’t comfortable working with power tools, it’s best to hire a contractor for the job. They’ll save you a lot of time and hassle, and they’ll make sure your fence is built properly. When hiring a professional, always look for one with a valid Home Improvement Contractor (HIC) license issued by the Department of Consumer Affairs. This will ensure that you’re working with a reputable and trustworthy professional.

Durability

The material you choose for your fence plays a big role in how long it lasts. Wood fences can last 15-20 years, while vinyl and metal fences can go even longer with proper care. The key is to balance longevity, maintenance, and style when choosing your material. Wood provides natural beauty and versatility, while vinyl and metal provide durability with less upkeep.

In addition to ensuring your materials are chosen wisely, proper installation is crucial to the longevity of your fence. Make sure the posts are set deep enough into the ground to support the weight of the materials and avoid shifting over time. The ideal depth of a post hole depends on soil type and the length and height of your fence.

Regular inspections can also help ensure your fence lasts as long as possible. Identifying and repairing any damage as soon as it occurs can prevent larger issues down the line. Wooden fences in particular can be susceptible to rot and insect infestations, so inspecting them for signs of damage or decay on a routine basis is essential.

Before building a fence, make sure you have clear property boundaries with your neighbors. You may need to consult a land surveyor to determine your property lines and if you have any easements that prohibit or limit fence construction. You should also reach out to your utility companies to find out if there are any underground pipes or cables that could be impacted by your fence project.

Whether you opt for a wood, vinyl, or metal fence, it’s important to protect it from the elements with regular coatings of preservative. Regular cleaning can also prolong the life of your fence and keep it looking beautiful. Keeping the surface free of dirt and mildew can help protect your fence from moisture damage, so it’s important to wash your fence on a regular basis. In cold climates, concrete anchors are recommended to prevent frost damage. These should be installed at least 36 inches in the ground to keep your fence firmly in place throughout the winter.

Aesthetics

A fence isn’t just a boundary marker; it can be an aesthetic accent that complements the yard and house. Choosing the right material, color and style will add to your home’s curb appeal and boost its value if you decide to sell.

Choose a design that reflects the architectural style of your home or the landscape surrounding it. If your property is near a river or lake, for example, consider using natural materials like wood or metal to blend in and create a tranquil atmosphere in the garden. Alternatively, you could opt for a sleek wrought iron fence that would coordinate with your home’s modern architecture.

Consider the height of your fence to meet local building codes and safety concerns. While low post and rail fences and pretty pickets can enclose your property with grace, if the fence is too high it may look imposing or create gaps that intruders could use to enter.

Once you’ve chosen your fencing material and layout, consider adding unique features to elevate the overall look. Weather-resistant art, wall hangings, paintings, signs and flower planters are just some of the ways you can transform your fence into a statement piece that’s sure to catch your neighbors’ attention.

Another great way to enhance your fence’s aesthetic is by planting trees, flowers and shrubs that will naturally complement its shape and hues. These greening elements will soften the straight lines of your fence and create a harmonious connection between your garden and the surrounding landscape.

Before you dig any holes for your fence posts, contact a utility locating service to locate and mark underground utilities. This will help avoid damaging any underground water or gas lines during the installation process. Then, dig the holes to a depth and diameter that’s suitable for your chosen fence material. Once you’ve positioned the posts, be sure to fill them with concrete or gravel for stability. After the cement has set, clean the tops of each post and apply a protective coating. Be sure to also apply a bead of silicone caulk around the base of each post to seal out moisture.

3D Printing for Prototypes

When used for prototyping, 3D Printing can reduce the time it takes to bring a new product to market and lower costs by reducing the number of materials used.

3D Printing Arizona creates models using a layer-by-layer approach. This technique allows engineers to create complex geometries that meet strength and weight criteria.

3D Printing is a novel manufacturing process that allows companies to create prototypes quickly and cheaply. It also shortens the production cycle by allowing businesses to test and receive product feedback. Its powerful forming capabilities also mean that it can be used to produce complex shapes that would be difficult to make by conventional means. 3D printers use a variety of different materials, including plastics and metals, but are particularly useful for specialty materials such as water-absorbing plastic, nitinol, gold, and carbon fiber.

After a model is scanned and sliced, it’s time for the 3D printer to do its magic. The printer works much like a traditional inkjet printer, dispensing wax or plastic-like polymer layer-by-layer, waiting for each level to dry before adding the next. Then, the layers are added until a 3D object is created.

Aside from its utility in prototyping, 3D Printing is also a great tool for hobbyists and small businesses. It allows individuals to turn their CAD designs into physical objects while allowing small businesses to transform ideas into products rapidly. In addition, 3D printers can be used to create and print specialized items for a specific purpose, such as parts for a drone.

As the world moves towards greater sustainability, 3D Printing offers a solution that aligns with the global effort to reduce environmental impacts. While traditional manufacturing processes produce significant waste, 3D Printing eliminates this by printing parts on demand and avoiding the need for large warehouses. It can also print components that are optimized for strength and weight, making them more cost-effective than traditional methods.

In addition to reducing waste, 3D Printing can also help to reduce shipping costs by eliminating the need for large warehouses. In some cases, this can even save businesses millions of dollars. The speed at which 3D Printing can bring a design to life is unprecedented, ushering in a new era of product development.

In education, 3D Printing enables students to visualize abstract concepts and connect them with real-world applications. This helps them develop a deeper understanding of theories and ideas, and fosters engagement and active learning. It is also a potent tool for students to identify needs in their communities and create solutions. Whether it’s designing and building a school nature play area or inventing a sanitary way to store blood testing strips, students can use 3D Printing to change the world around them.

It’s a business

A 3D printer is an incredible tool for entrepreneurs, but it requires a lot of patience. You’ll need to spend time researching the industry, figuring out what materials and colors you’ll need, and learning how to operate the equipment. Once you’re familiar with the process, you can begin making your own products and selling them online. If you’re interested in starting a 3D printing business, you should draft a comprehensive business plan. This will help you make sure your company is a success and that you meet your entrepreneurial goals.

You should also consider what your target customers will be. This will impact the type of business you are building and how you go about marketing your product. For example, fashion designers will respond differently to a marketing campaign than car manufacturers. Once you’ve identified your customer segment(s), you can start creating your marketing strategy.

Another potential area of opportunity is the mass customization model. This involves offering bespoke products that are tailored to the needs and whims of each individual consumer. The ability to create customised items quickly using 3D Printing can be a great way to tap into this trend.

Getting started in a 3D printing business may require some startup capital. This can be achieved by using personal savings, credit cards, or bank loans. Before you apply for a loan, though, you’ll need to present a well-written business plan. This will give the bank confidence that you will be able to repay the loan.

A 3D printing company requires physical space, and the cost of this can vary widely. You can work out of your own home if you are serving a local market, but if you’re planning to serve a larger client base, you may need to rent a warehouse or other industrial space. You’ll also need to pay for electricity and other utilities.

Another challenge of a 3D printing business is the risk of accidents and fires caused by the use of flammable materials. For example, if a filament catches fire while being printed, the entire machine could burn down. This is a serious issue for companies that manufacture medical devices or other potentially hazardous products.

It’s a hobby

3D Printing is a rapidly developing technology that has the potential to upend the manufacturing industry. This process uses specialized equipment to construct three-dimensional objects from a digital model. The resulting solid object is made by building layers of material, such as plastics or metals, into the desired shape. This is a form of additive manufacturing and it can be used for a wide range of applications.

The process begins with a virtual design, which can be created using a variety of software programs, from simple applications designed for novices to more advanced tools favored by engineers and designers. The virtual design is then prepared for Printing by breaking it down into hundreds or thousands of thin layers, a process known as “slicing.” The sliced model is then printed layer by layer on a printer, which creates the final object.

A 3D printer is a great way to try out new ideas and prototypes. It is also an excellent tool for experimenting with the mechanics of an object and finding flaws in its design. For example, a model might be too weak in one part of the structure. A 3D print can help you see this and correct the problem before it becomes a larger issue.

Another benefit of 3D Printing is that it can be a lot cheaper than traditional manufacturing. In addition, it can save time by reducing the amount of assembly and testing required. It can also produce a more durable product than conventional manufacturing methods.

Although 3D Printing is not yet widely available, some businesses have already started using it to cut costs and improve their efficiency. Many businesses are using the technology to make bespoke components for their products, such as replacement parts and custom-made containers. Moreover, companies are using 3D Printing to make prototypes and test their products.

However, it is important to note that, like any other hobbyist technology, 3D Printing can be prone to failures and problems. While the majority of these issues can be fixed, it is important to know what you’re getting into before buying a 3D printer. Cheap machines, for instance, tend to break down easily and can be difficult to troubleshoot. The stock Teflon-lined hotend in many basic machines, for instance, can wear out after a few kilograms of plastic are printed.

It’s a way of life

3D Printing is becoming a way of life for designers, engineers and manufacturers. It allows them to see their designs quickly go from digital blueprints to physical objects, enabling them to take swift action and avoid traditional design stumbling blocks. 3D Printing can also save time and money, as it eliminates the need for prototypes and minimizes the risk of costly errors that often occur during the production process.

It is easy to see why many colleges and universities now offer specialized degrees in additive manufacturing. These programs give students the skills they need to work in fields that use 3D printers, such as industrial and architectural design. They also teach students to think differently and create new products, helping them become innovative leaders in their industry.

Another benefit of 3D Printing is its ability to produce complex geometries that are difficult or impossible to create with conventional technologies. It can even make components that are light without sacrificing strength. The technology also makes it possible to create internal cavities and lattices that improve performance and energy efficiency. It can also be used to produce medical devices that are more precise and suited to the patient’s anatomy.

In addition, 3D Printing can reduce costs for businesses, which are already operating at a loss. The technology can also provide rapid prototyping for a fraction of the cost of traditional methods. This can help reduce the time it takes to market a new product and increase efficiency in the development of future designs.

The 3D printing process can be used to produce a variety of materials, including plastics, metals and concrete. It can also be used to print speciality materials that are more heat resistant, water repellent or have other unique properties. This is especially useful in areas where the durability of an object is critical, such as aerospace and automotive industries.

Another benefit of 3D Printing is its ability for businesses to customize and personalize their products and services. This technology can allow businesses to create individualized products or parts for specific customers, which can boost sales and loyalty. It can also be used to make products more aesthetically appealing or to meet special needs. For example, a company can print personalized medical prosthetics for patients with unique anatomy. This can also help with patient satisfaction and safety.

The Benefits of Carpet Cleaning

Carpet Cleaning El Dorado Hills is a routine maintenance process that helps extend carpet life and maintain indoor air quality. Regular vacuuming removes most dry soiling and stains. Stains should be blotted promptly to reduce the likelihood of permanent color change.

Like your teeth, carpeting needs upkeep. Regular cleanings help prevent serious problems, catch problem areas before they get significantly worse, and extend the life of your carpeting.

Carpet adds warmth and beauty to facilities but can also absorb soils, contributing to facility maintenance costs. These include the cost of cleaning chemicals, water, and disposal. Dry soils are abrasive to carpet fibers and contribute to premature wear. When not cleaned properly, carpet fibers become matted and abraded, reducing the product’s lifecycle.

A facility can reduce its maintenance costs by developing an effective preventative maintenance program that stops soils from entering the building. By stopping the entry of dry soils by sweeping and mats, removing soils on a daily basis through vacuuming, and by performing interim low-moisture carpet cleaning procedures and periodic wet extractions (carpet should be cleaned at least twice a year), facilities can keep their carpet looking good longer.

Vacuuming is the most important step in carpet maintenance. High traffic areas should be vacuumed at least daily, moderate traffic areas weekly and low traffic areas monthly. A good quality commercial vacuum with a brush or turbo attachment is the best choice to avoid damaging the pile.

Walk-off mats placed at doorways can remove a majority of the soiling that is tracked into carpeting. Mats should be cleaned on a regular schedule and must be clean and dry to work properly.

If spills occur, they must be treated immediately. Most spills can be prevented by blotting with a white cotton towel and applying pre-tested spot removal products.

When staining is a problem, a pre-conditioning product can be used before hot water extraction. This helps to break up the oily, sticky residue that clings to the fibers and accelerates soiling.

A carpet with a clean appearance looks attractive and demonstrates the facility cares about its image. It can also add resale value to a home. When considering purchasing a home, buyers will be impressed with well-maintained carpet. In addition, the homeowner will benefit from a healthier indoor environment and lower utility bills as a result of properly maintained carpeting. The carpet can also be used to provide traction for the family members who have mobility issues.

Vacuuming

Carpets add a cozy feel to rooms and help keep feet warm, but they can also trap dirt and debris that is tracked into the home. Dirt that is left to sit on carpet fibers breaks them down, attracts and holds odors, and can lead to matting and other structural problems in the home. Frequent vacuuming and the use of a top performing carpet cleaner are important to protect your investment and help maintain a healthy indoor environment.

Vacuuming removes the loose surface dirt, but there are still many types of debris that hide between carpet fibres. The best way to ensure that you are removing all of the dirt and debris is to vacuum thoroughly and frequently, especially in high traffic areas. Aim to vacuum at least once per week and more frequently if you have children or pets. When vacuuming, make sure to go over the entire room and pay special attention to corners and under furniture.

Using a carpet shampooer is a good way to lift up and rinse away the debris that vacuuming alone cannot get rid of. A good carpet shampooer will have several cleaning modes to address specific needs. For instance, the BISSELL(r) Revolution HydroSteam(tm) has a Pretreat Mode to help loosen tough pet messes before you start, PowerWash(tm) Mode to deep clean your carpet, and Quick Dry Mode to speed up the drying process.

Allergens like dust mites, dander, mold, and bacteria love to live in carpet fibres. They can cause respiratory issues for you and your family, especially when they aren’t cleaned regularly. Vacuuming helps to remove these allergens from the house, which can reduce the number of times you and your family need to sneeze and cough.

Vacuuming, spot treating stains as soon as they occur, and frequent dry cleaning can all help to extend the life of your carpet and keep it looking great. To help prevent soiling, blot spills with paper towels instead of stomping on them to avoid pushing the liquid deeper into the carpet fibres. If you have a carpet with darker colours, use a carpet cleaner with a pretreatment mode to lift tougher stains.

Hot Water Extraction

The most common carpet cleaning method is hot water extraction (HWE). Known for its deep-cleaning and revitalizing abilities, this popular process loosens the dirt, grime and soils lodged within your carpet fibers. The hot temperatures and pressure combined with a powerful cleaning solution then lift these contaminants away and leave your carpets and furniture clean and fresh.

During the HWE carpet cleaning process, technicians apply a pre-treatment that softens and degreases any staining and ground-in debris. Next, they inject the cleaning solution into your carpet fibers at high pressure and agitate with a specialized tool. Then they extract up to 95% of the moisture and the dirt, leaving you with clean and sanitized carpets. In addition, anti-microbial treatments can be added to this process for enhanced sanitization and prevention of mold, mildew and other bacteria growth that can cause unhealthy living spaces.

A lot of people confuse this type of cleaning with steam cleaning but don’t be fooled, there is no actual steam involved in this type of cleaning. The wand-like tool used in this process actually injects the hot cleaning solution into the stained areas and then uses the pressure of the machine to extract up to 95% of the moisture back along with the dirt, stains and grime that have been released.

Another benefit of this cleaning technique is its ability to eliminate odors and disinfect your carpeting. The cleaning solution used in this process has been formulated to kill germs, including microscopic dust mites, that are known for contributing to respiratory conditions like asthma and can make allergic reactions worse. These microscopic creatures are easily killed by the hot water and cleaning detergent mixture that is injected into your carpet during this type of cleaning, killing them and then flushing them out into the waste tank of the machine.

This cleaning technique also works well to address lingering odors caused by smoking, pets and cooking. This is because the sanitizers included in the HWE cleaning solution work to remove these odor-causing substances, preventing them from returning after the carpet has been cleaned. In addition to being a great option for treating stubborn stains and sanitizing your carpeting, this type of cleaning is also a valuable service in the aftermath of water damage and flood restoration, as it can be performed on rugs, carpeted stairs and other hard-to-reach places that regular vacuuming and dry cleaning cannot.

Stain Removal

Carpet and area rugs add comfort, warmth, and style to a room. But they also trap dirt and grime from walked-on shoes, food and drink spills, and pet accidents. Regular vacuuming and spot stain removal with a commercial carpet cleaner can help keep stains at bay. But for those stubborn, long-standing stains, a deep cleaning is often needed to get the job done.

A professional cleaning company can use specialized equipment and techniques to achieve this goal, but there are many home remedies for deep carpet cleaning that you can try yourself. Many of these methods are gentle enough for use on wool and even some synthetic carpets. But before you start, read the care instructions on the tag of your carpeting and area rugs to determine the best method for them.

Ideally, every type of carpet stain should be treated as soon as possible. Stains that aren’t treated right away will soak into the carpet fibers and cause permanent color changes. This is particularly true for dyed stains, such as juice, coffee, and even artificial food coloring. When a stain does occur, always blot the area rather than rub it. Scrubbing will only spread the stain around and make it harder to remove.

After you’ve used a stain treatment, always rinse the affected area with lukewarm water. This will help ensure that all of the cleaner residue is removed from the carpet fibers and that no soapy, sticky residue remains to attract dirt over time.

You can also try making a DIY cleaning solution using a small amount of mild dishwashing detergent mixed with warm water or hydrogen peroxide (diluted). Just be sure to test any solution in an inconspicuous part of your carpet before attempting to treat it. You should also blot the cleaned area with clean paper towels instead of saturating it with the cleaning solution or water. This helps to prevent oversaturation and can also help to reduce the likelihood of any accidental bleaching that might occur. You should never use chlorine bleach on wool or wool-blend carpets, as it can damage them.

The Importance of Roofing Maintenance

A roof is your home’s first line of defense against the elements. Routine maintenance helps prevent leaks and other damage.

Inspect for shingles that are loose, lifting, curling or peeling. Also look for moss or algae growth. Make sure there are no debris pile ups that could cause obstructions in drain flow and ponding water. For professional help, contact North Port FL Roofing.

Roofing

1. Inspect the Gutters

Gutters serve a crucial function: they help to safely redirect water runoff away from the roof and home structure. Gutters that are clogged or not performing their functions can lead to costly moisture damage to the roof, fascia, siding, foundation and yard of the home. This is why gutter inspections and maintenance are so important.

Residential roofing experts recommend cleaning out your gutters twice a year (in spring and fall) as part of a thorough roof maintenance checklist. Use a hose to flush out the debris in the gutter and watch for water exiting the downspouts freely. If it doesn’t, take the time to unclog the downspout. If you’re comfortable using a ladder, enlist a spotter and follow all common-sense safety measures when working up high.

When inspecting your gutters, pay close attention to the flashing, which is a layer of metal or plastic that seals around vents and chimneys as well as joints in the roof. Look for cracks, gaps, rust or wear which can indicate the flashing is no longer watertight and needs to be replaced. Also, look for water stains in the attic or along walls adjacent to roof structures, which can indicate a leak.

Lastly, check the gutters for proper attachment to the roof. Loose gutters can pull away from the roof during heavy storms and create additional damage to the roofing system and other areas of the home. This is particularly true of older gutters that are built into the roof structure (cornice or hidden gutters) or hung gutters (Yankee gutters). Inspect the gutters and downspouts for loose spikes or hangers and resecure them if necessary. In addition, reposition the hangers or spikes to increase the slope of the gutters toward the downspouts.

2. Inspect the Soffits

The roof eaves, including the soffit and fascia boards, are another important element of a healthy roof. They protect rafters and beams from water damage, as well as shield the attic and upper floors of a building from moisture build-up. A roofing professional will inspect soffit and fascia boards for damage and make sure they’re functioning properly.

The soffit is the board that covers the underside of a roof overhang, while fascia is a wood or metal sheet that runs along the edge of a wall and the top of a house’s gutters. An inspector will check for rot, cracks, warping and other types of damage. He will also examine the drip edges, which are strips of metal that direct water away from the fascia boards.

When a soffit or fascia is damaged, it can allow moisture to penetrate the structure, leading to mold, mildew and other interior problems. This can also cause leaks in the attic and upper floors of a home. A regular inspection of these areas can catch problems and stop them from becoming more serious, preventing costly repair work down the line.

In addition to checking for rot and other damage, an inspector will look at the soffit vents to make sure they are clear of debris and functioning properly. He will also check for rust or cracked flashing, which lines penetrations, such as skylights, chimneys, vent pipes and more. A faulty flashing can lead to leaks, so it’s important to replace or repair it as soon as possible. A roofing professional will also check the soffit, fascia and penetrations for signs of pest intrusion and to ensure that they’re properly sealed.

3. Inspect the Flashing

Often overlooked, flashing is critical to the integrity of your roof. It seals the areas where your roof meets other parts of your home, like chimneys, skylights and vents, as well as joints between sections of your roof. If you find a gap or area of deterioration in your flashing, it’s important to repair it promptly. Otherwise, you may experience water penetration, causing ceiling and wall damage.

Flashing is available in a variety of styles and materials, each designed for specific purposes. For example, step flashing is used to seal the gaps between the shingles and vertical walls. You will also find it at the bases of roof penetrations like chimneys and dormers. Another type of flashing is called apron flashing. This is L-shaped and installed under each shingle as it butts up against the vertical face of a wall.

You should check your flashing every time you perform a roof inspection. This includes after storms and major weather events. Look for signs of rust or missing flashing at the points of roof protrusions, like chimneys, skylights and ventilation. Also, check for flashing around the valleys of your roof where two slopes meet. These are high risk areas for leaks.

You should also inspect the attic and walls adjacent to the roof for signs of moisture, mold and discoloration. In addition, during rainy seasons, listen for the sound of dripping in the attic or walls, which can indicate poor flashing. Finally, if you find a problem with the flashing, make sure that it is repaired by an experienced roofing contractor. This is a small investment that will help protect your home from expensive problems down the road.

4. Inspect the Shingles

It’s important to inspect the shingles because these are the first things to show signs of damage and wear. A visual inspection is necessary, as well as a touch test to feel for subtle damage like cracks and chips. Damaged shingles should be replaced immediately to prevent water from entering the roof structure and leading to further problems. A shingle that has been cupped (the edges are higher than the center) or is curled can also allow water to seep underneath, causing additional damage to the underlayment and roof decking.

Dark spots or streaks on the shingles may indicate moss or algae growth. While this does not directly damage the shingles, it can trap moisture that can weaken and damage them over time.

Cracked shingles are often the result of extreme weather conditions and can lead to leaks and further damage if not addressed. Blistering shingles are another sign of deterioration and should be replaced as soon as possible to avoid further damage.

Check the flashing around chimneys, vents, skylights, dormers and other structures on the roof for gaps or rust that could allow water in. It is also a good idea to inspect the flashing around these areas after heavy rains to ensure that it is sealing water out effectively.

A final important thing to note is that it is always a good idea to examine the interior of the building for signs of water damage, such as mold and mildew, drips and leaks, and peeling paint. This can be caused by moisture buildup under the shingles and is an indication that it is time for a professional assessment and replacement. This is particularly true in areas that are prone to heavy snows and hurricanes.

5. Inspect the Flashing

Flashing is sheet metal fabricated to a specific shape and designed to prevent water intrusion into the roof system. It is used in areas of the roof that are more likely to leak and carries moisture away from the intersections of walls and the roof, as well as around roof openings like chimneys and skylights.

Over time, flashing can corrode or dislodge. When this occurs, the roof covering may fail and moisture penetration into the building may occur. It is important to inspect the flashing regularly and to ensure it is properly secured and sealed.

Inspecting the flashing can be a difficult task, as it is often located in inaccessible places. It is essential to have a ladder large enough to reach these areas and be comfortable climbing on the roof. It is also a good idea to wear gloves and safety goggles.

A roof inspection is an opportunity to look for signs of damage, especially rust and corrosion in the area of the flashing that meets other roofing materials or roof protrusions. A common cause of leaks is faulty flashing, and it is important to repair any issues identified during the inspection.

When extensive damage or deterioration is observed, it is recommended to consult professional roofers for a thorough assessment and recommendations for comprehensive repairs. Regular roof maintenance can help to prevent leaks and other costly problems, such as structural and mold damage. A good roofer will be able to spot problems early, and provide timely repairs. This will save you money in the long run, and protect your home’s investment.

How to Use Landscape Lighting to Enhance Your Home’s Exterior

Your home’s exterior should be a place that showcases your personal style and makes you proud to show it off. Landscape Lighting Harrisburg PA is a great way to do this.

Landscape Lighting

It offers safety, security and beauty for your yard or outdoor spaces. It fosters the spatial experience and enhances visual appeal after dark.

Uplighting is a great way to showcase a garden, tree or other feature in your landscape after dark. It’s done by placing a light fixture low to the ground or at a shrub or plant, and shining it upwards. This creates a dramatic effect, with a mix of bright light and dark shadows.

It’s also a beautiful way to highlight a statue, fountain or other hardscape feature. It can also be used to add drama to a large wall or fence, and can even showcase a water feature in a whole new way. The key is to choose the right fixtures and location for uplighting, so you get a balance of function and aesthetics.

For example, a small uplight can draw attention to a unique shape in a rock garden or a plant with interesting bark or color, while a large uplight can highlight a tall tree or other element. Another important consideration is the amount of light a particular uplight produces, which is called lumens. The best landscape lights come with adjustable lumen output, so you can set the brightness to your desired level.

Other landscape lighting techniques include silhouetting, which highlights an object by aiming the light behind it, and cross-lighting, which draws attention to both sides of a feature. Then there’s the “moonlighting” effect, which can be achieved by highlighting leaves and branches with light that reflects off the water or ground.

While uplighting and other techniques are great ways to illuminate your landscape for both function and beauty, don’t forget about safety. Keeping walkways and stairs well-lit ensures that family members and guests can navigate your property after dark safely. It also helps deter potential vandalism and burglary, as it makes your home less of a target.

Landscape lighting is powered by a transformer, which reduces your home’s 120-volt electrical system to safe 12 volts for all the light fixtures in your yard. This eliminates the need for risky wires and allows you to enjoy your yard at night without worrying about safety or security issues. Each light fixture then connects to the transformer with a length of wire, and is attached to the ground with stakes or mounted using a bracket.

Downlighting

The opposite of uplighting, downlighting is the installation of lights high in your landscape to illuminate areas and objects below. This is most often done to light a driveway, patio, or lawn area for safety and visibility. This technique also mimics moonlight in a more controlled way by shining light through branches and leaves to create a dappled effect on the ground.

Downlighting is a great alternative to floodlights which tend to overpower and overwhelm landscape elements with their brightness. It can be used in conjunction with uplighting to add depth, ambiance, and functionality to your landscape after dark.

Whether you’re interested in creating an inviting feel, highlighting architectural features, or bringing safety to your home and garden, Landscape Lighting is a great investment. It will enhance your property and make it more attractive and functional to live in, entertain guests, and enjoy the outdoors all year round.

When done correctly, Landscape Lighting can highlight your home’s best features without overpowering it. In fact, it will actually bring more value to your home and be a selling point should you ever decide to move.

While it may sound complicated, landscape lighting is actually fairly simple once you have the basics down. It starts with a transformer, which plugs into an outlet. From there, a super long wire feeds to the different spots in your landscape, where you can cut the wire and splice it into a fixture’s wires, mount them, and hide the connections with mulch or rock.

We use fixtures made by VOLT(r), which are of the highest quality and will last for years with no issues. They are made of solid brass and copper so they’ll never rust and have a timeless look that will complement your landscaping.

The beauty of this type of lighting is that it brings a whole new level of detail to your landscape at night, especially with the play of light and shadow on walls and structures. It can really show off the texture and details of your stucco, brick, or stone work that might not be visible during the day, and even highlight the silhouettes of trees and other architectural features. This is one of our favorite ways to highlight the unique beauty of a property and set it apart from other homes in the neighborhood.

Cross-Lighting

Incorporating cross lighting into your landscape design adds depth, intrigue and detail. Whether it’s illuminating the intricate details of a garden statue or highlighting architectural features on your home, this technique can make any feature shine. When used in combination with other lighting techniques, it creates a magnificent nighttime atmosphere and highlights your landscape’s most stunning features.

There are a number of different types of landscape lighting to choose from, including uplighting, downlighting, cross lighting and silhouette lighting. Uplighting involves placing lights at ground level and pointing them upward, creating dramatic shadows and enhancing the texture of your landscape. Downlighting is the opposite, illuminating an area from below to create a soft glow over walkways and gardens. Cross lighting uses two or more lights aimed at an object from oblique angles to illuminate it from multiple sides. This technique minimizes shadowing and emphasizes texture, making it ideal for statues or large trees. Silhouetting involves placing a light behind an object to create a striking silhouette effect, ideal for flagpoles or garden art.

Path lighting is the functional element of your landscape, illuminating pathways and areas where visibility may be a concern for safety at night. This type of lighting is typically positioned low to avoid glare and to highlight the details of your pathway’s surface. It’s also a great way to showcase stepping stones, retaining walls and other elements in your landscape. When choosing path lights, opt for those with a warm color temperature to create an inviting ambiance.

A well-designed landscape lighting scheme is a must for anyone looking to maximize their property’s potential after dark. A professional lighting company will use a variety of techniques to highlight your landscape’s most beautiful features and create a mood that is both inviting and practical. The best landscape lighting options combine uplighting and downlighting with cross lighting to create a layered lighting effect that is both functional and beautiful. Energy efficiency and durability are also important when selecting landscape lights, so look for LEDs or solar-powered options to ensure longevity and minimize your carbon footprint.

Inground Lights

Often used in place of path lighting or lights on a deck, inground landscape lighting is installed underneath the ground. Because they are flush with the ground, these lights are tougher to trip over or damage compared to above-ground light fixtures. They can also be recessed into concrete, pavers and other hard surfaces.

These landscape fixtures create a stunning effect in your yard or garden at night, especially when combined with up lighting. They can highlight a particular tree or shrub, or can be installed around a pool to illuminate the water and the surrounding area.

In ground lighting is particularly popular with commercial accounts because it creates a very clean look for outdoor areas that have a lot of foot traffic or vehicles. Because the fixture is buried in the ground, it is less likely to be damaged by lawn care equipment or cars passing through.

Depending on the purpose of the lighting, different in grade luminaires are recommended in terms of size, wattage and color temperature. For instance, small in ground fixtures are perfect for accenting a single plant, while larger features such as large trees, gated entryways and other tall structures require more powerful and higher wattage luminaires to stand out effectively.

Another factor to consider when choosing an in ground luminaire is whether you want a dimmable or non-dimmable fixture. Many LED smart landscape lights now come with tunable white and RGB capabilities, so you can change the color of your lighting to match the season or for special events. This is a great way to add a splash of color and make your landscape lighting truly unique. Aside from that, dimmable LED well lights can help reduce glare in your outdoor space, making them much more comfortable to use than their non-dimmable counterparts. If you are unsure of what type of in ground landscape lighting you need for your project, consult with your local lighting professionals to learn more about the options available.