Insulating the ceiling of a home or commercial building is a vital part of energy efficiency. Without insulation, heat from heaters in the winter and air conditioning in the summer escape through uninsulated areas, and cool air escapes through uncovered ones.
Different types of insulation, such as spray foam, cellulose and batt insulation, offer different long and short-term benefits. Reach out to Ceiling Insulation Perth for expert assistance.
Ceiling insulation is a great way to improve the comfort of your home. It helps maintain a stable temperature all year round, meaning your heating and cooling systems don’t have to work as hard. This can lead to significant energy savings. In addition, it can help reduce noise pollution by absorbing sound waves. This makes it a good choice for homes with children or pets.
There are several different types of insulation available, so you can choose the best one for your needs. If you’re looking for thermal efficiency, make sure the insulation has a high R-value. If you’re concerned about noise, consider choosing acoustic insulation. Finally, it’s important to consider moisture resistance and fire safety ratings. You also want to consider installation costs and labour requirements.
Spray foam insulation is a popular option that’s sprayed onto ceilings to create an airtight seal and provides superior insulating power. However, it can be more expensive than other options and requires professional installation.
Fiberglass batts are another popular and cost-effective option. They’re made from recycled glass and sand and are effective at retaining heat and reducing noise. They’re also eco-friendly and fire retardant, making them a great choice for homes with kids or pets. However, they can be itchy to handle and may not perform well in humid conditions.
Cellulose insulation is another sustainable insulation option. It’s made from recycled paper products and is treated to be fire resistant. It’s often blown into place, which makes it a great option for attics with difficult access. However, it’s not as effective at reducing heat loss as fiberglass batts and can settle over time, lowering its R-value.
Spray foam is the most expensive type of insulation, but it offers a number of benefits that make it worth the investment. It’s a good choice for attics with difficult access, as it can be sprayed in between the joists to ensure an airtight seal. It also has a high R-value and can reduce both air leakage and noise. Spray foam can also help prevent ice dams on your roof.
Reduced Energy Bills
Adding ceiling insulation reduces your energy bills by keeping heat in during winter and out in summer, making it more cost-effective to run your household. Insulation also slows the transfer of sound between floors, creating a quieter living environment. This leads to reduced energy costs and a more sustainable home, helping to reduce your carbon footprint.
On average, a better-insulated property sees a yearly reduction in energy bills of between PS270 and PS445. Investing in proper ceiling insulation can therefore help to significantly cut your energy bills. It is a worthwhile investment for any homeowner and provides excellent value over its lifespan.
The various types of ceiling insulation available on the market are designed to offer varying levels of thermal resistance. Some are more effective than others in slowing the flow of heat, with spray foam offering superior results and a higher R-Value than other types of insulation. Insulation products are also made with a variety of materials that are environmentally friendly and biodegradable, ensuring that they will last for years to come.
If you are planning on insulating your property, consult with professionals that can advise on the best R-Value and installation method for your property. This will ensure that you achieve the desired results and maximum savings. Additionally, it is essential that the ceiling insulation is properly installed to prevent moisture build up, which can lead to rotting timber, mould growth and unhygienic living conditions.
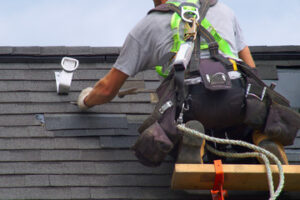
Depending on your insulation requirements, there are a number of tools and safety equipment you will need to have at hand when installing your insulation. These include a tape measure, utility knife, staple gun, putty knife and gloves. A respirator is also highly recommended to protect you against the irritation caused by dust particles.
There are a wide variety of options for insulating your property, including cellulose, polyester, and rock wool. The most environmentally friendly option is polyester, which is produced from recycled materials such as newspapers. It is fire-resistant, hygienic and durable and can help to reduce the occurrence of asthma and other respiratory conditions in your home. It is also heat bonded, meaning that rats cannot pull it apart like other insulation materials, and it can be easily fitted to a variety of surfaces.
Increased Value of Your Home
Insulation adds value to a home by increasing its comfort and energy efficiency. It is also a green home improvement, helping to reduce your carbon footprint. Homes with proper insulation have higher resale values, which can offset initial installation costs. Homeowners should choose high-quality materials and work with reputable insulation professionals to ensure a safe and successful installation.
A home with proper insulation is less likely to experience moisture problems, which can lead to rotting timbers, mould growth and unhygienic living conditions. Moisture in the ceiling can also cause structural damage, so it is essential to invest in insulation that prevents moisture buildup.
Installing a new insulation to your existing ceiling will improve its overall quality and make it more energy efficient, which can have an impact on its resale value. A new insulation will be easier to maintain, which can increase its longevity and reduce maintenance costs.
In fact, Remodeler Magazine’s annual Cost vs. Value Report found that adding fiberglass attic insulation can return 117% of the investment when you sell your home. This is a much better return on investment than most other home improvements.
Choosing the right type of insulation for your home depends on the structure, climate and your budget. For example, cellulose and cotton fibers are made of plant material and are naturally fire-resistant, so they offer a safer alternative to synthetic insulation products. Moreover, they are more durable and have a greater R-value than most synthetic insulation.
You can easily measure the R-value of your ceiling by using an R-value calculator, which will give you a general idea of how much insulation you need. However, for best results, you should consult a professional to determine the precise type of insulation that is required for your specific situation.
When calculating the cost of insulation, consider the initial material and installation costs as well as the monthly energy savings. The most expensive type of insulation is spray foam, while blown-in insulation is cheaper but can be difficult to install in hard-to-reach areas.
A reliable and reputable insulation company can provide you with a free home energy assessment, which will help you decide which type of insulation is right for your home. They can also help you choose the appropriate R-value for your home.
Increased Home Value
Insulating the ceiling in your home is an investment that pays off with enhanced energy efficiency and comfort, and increased resale value. Despite being one of the most cost-effective insulation upgrades available, many homeowners overlook this energy-saving investment. This is a mistake. Insulation is an important upgrade that not only helps homeowners save money on monthly energy bills, but also reduces sound transfer between floors and improves the effectiveness of zoned HVAC systems.
The return on investment of a new ceiling can be significant, with savings on utility costs alone more than making up for the initial installation cost. In fact, according to Remodeler Magazine’s “Cost vs. Value” report, re-insulating the attic with fiberglass insulation is one of the top renovations you can do to increase the value of your home.
Energy efficiency upgrades are highly desirable among most qualified homebuyers, as they can offer a more cost-effective way to live in a home. While the impact varies based on the size of the home and type of insulation, homeowners can generally expect to see between 2 and 6 percent in increases in property value.
Insulation slows heat transfer, allowing the HVAC system to work less hard to maintain comfortable temperatures throughout the house. It’s an easy improvement to promote to prospective buyers as an effective, long-term way to cut down on energy costs.
In addition to the obvious financial benefits, a new ceiling also makes your home more comfortable and can significantly improve sound control. In addition, it can help with air quality and moisture control, providing numerous health benefits.
To maximize the benefits of insulation, you should always hire a professional contractor for installation. Improper installation of insulation can decrease its performance and even cause fire hazards. In addition, it’s a good idea to regularly inspect your insulation for signs of water damage and rodent infestation. If these problems are found, it’s important to correct them before the problem worsens.