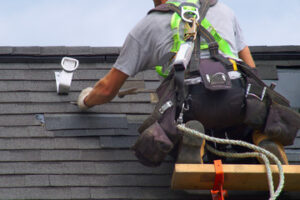
Epoxy Pipe Lining is a non-invasive pipe restoration method that avoids extensive digging and disruption to buildings. It’s often used in historic properties and commercial or industrial facilities that would otherwise need to close down.
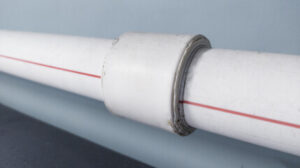
The process involves running a flexible liner saturated in epoxy resin into your existing pipes. This creates a “pipe within a pipe” that’s resistant to corrosion and root infiltration.
Epoxy Pipe Lining is less invasive than traditional repiping because it can be done without tearing up your home or business’s walls. It is also less disruptive because the process only takes a few hours up to a day to complete compared to traditional repiping that can take weeks depending on how extensive the work is.
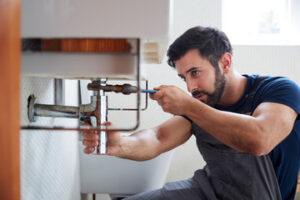
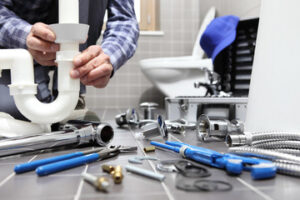
Before a plumbing professional can apply epoxy, they’ll first use sewer camera inspections to determine whether your pipes are in good enough shape to accept the new liner. If they’re not, the technician will provide you with a different solution that will meet your needs. Once the pipes are prepared, they’ll apply a liner that creates a slick inner coating that increases water flow and minimizes blockages by preventing calcium deposits from sticking to the surface of your pipes.
When the lining is applied, it will take just 24 hours to fully harden. After this time, your pipes will be ready to be used again. Epoxy liners can be used to restore commercial and residential drains, sewer pipes, water supply lines, heat and air ducting, and electrical conduits.
The slick inside of the epoxy liners reduces blockages and improves water flow, allowing your pipes to function better and last longer. It’s a safe option for your pipes because the resin is lead-free and corrosion resistant. It’s also environmentally friendly because it eliminates the need for excavation and minimizes ecosystem disruption.
Epoxy liners are also approved by the National Sanitary Foundation (NSF) which validates anything that goes into drinking water, and it is backed by the International Association of Plumbing and Mechanical Officials (IAPMO). These approvals ensure that you’re receiving quality plumbing services from a company that uses only approved plumbing materials.
Less Expensive
If you’re considering the cost of repairing your plumbing pipes, you might be wondering whether epoxy pipe lining is less expensive than traditional repiping. In general, epoxy lining costs less than installing new pipes because it doesn’t include extra costs like excavation, drywall repairs, landscaping work or slab leak repair. Additionally, the epoxy lining process requires much less labor than a traditional repipe.
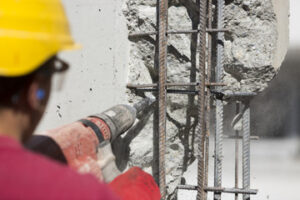
In addition, epoxy lining is also less expensive than other types of pipe lining because it can be used in a wide range of pipes and pipe materials. It is especially effective in repairing pipes made of cast iron, clay or concrete and in corroded steel pipes. This makes it a great option for older homes or commercial buildings that have old, corroded or collapsed pipes.
Epoxy pipe lining can be installed in any type of pipeline including sewers, drains, water pipes, heat and air conditioning ducting and electrical conduits. It’s also a good choice for pipes in hard-to-reach areas, such as under concrete slabs or behind walls. This means you can restore your piping without having to break into the building or disrupt anyone’s daily activities.
The slick interior coating of the epoxy liner increases the flow of water and reduces the risk of blockages. It also prevents toxins and debris from getting into the water supply, which can improve water quality. In addition, the epoxy liner is lead-free and corrosion resistant and can protect your pipes from future damage.
Epoxy piping can be used in a wide variety of applications and structures, including hospitals, schools, office buildings, hotels and residential properties. It can be used for both domestic and industrial pipe repairs and is often a better alternative to repiping when your pipes are damaged or nearing the end of their lifespan. However, traditional repiping might be the best choice if your pipes are severely damaged or have a significant number of leaks.
Reduced Risk of Corrosion
A pipe system that is leaking, corroding or otherwise damaged can cause serious damage to your home or business. In addition to requiring costly repairs and renovations, it can also lead to water damage and high energy bills. The good news is that epoxy pipe lining is an effective solution to these problems.
This repair option is a non-invasive way to restore your pipes and can be completed in one day. It is safe to use in both residential and commercial properties and can be used on a variety of pipe materials, including concrete, PVC, clay, cast iron and ductile steel. It is also NSF certified, meaning it complies with rigorous standards for safety, quality and sustainability.
While the epoxy lining process is not without risks, it is much less risky than a traditional pipe replacement. With a traditional pipe replacement, plumbers must take out wall panels and flooring which can be a lengthy and expensive process. With the lining method, plumbers only need to dig open a small area for inspection, which can be done in a fraction of the time.
Moreover, the lining material does not contain any toxins and is safe for drinking water. This is a big difference from the chemicals that are used to manufacture some pipe coatings, which can be leached into the drinking water supply and pose a significant health hazard. In fact, one study found that the epoxy coating used in the construction of the MVP pipeline on Bent Mountain contained methyl isobutyl ketone and ortho-, meta- and para-xylene, all known carcinogens.
Epoxy lining is a great solution for your pipes, but it is important to choose a trusted professional for the installation process. A qualified company will have extensive experience and use high-quality epoxy that is durable and long-lasting. They will also make sure that the pipes are in a condition suitable for lining and that the liner is a perfect fit for your pipes.
Increased Lifespan
Unlike traditional pipe replacement methods, epoxy coating is a trenchless solution. This means that no destruction is made to the surrounding landscaping and property. This is especially important for homes, buildings, and businesses that want to avoid costly reconstruction costs.
Pipe lining is also more efficient than total pipe replacement. This is because it eliminates leaks, and protects the pipes from future damage. In addition, it ensures that the water quality is as high as possible. The pipes are coated with an epoxy resin, which is a hard and durable plastic material that is impervious to corrosion and other environmental factors.
Before the piping is lined, the existing pipes are cleaned using a high-pressure water jet system and other specialized tools. This is to remove any fat, oil, grease, mud, dirt, and debris that may be stuck inside the pipe. Once the pipes are clean, an internal bladder is inflated to press the lining against the pipe walls. Once the lining is in place, it is left to cure, which takes between 4-8 hours. Once the curing process is complete, the bladder is removed, and a camera inspection is performed to make sure everything looks good.
The epoxy lining is suitable for most pipes, including sewer and water lines. It can even be used in refractory lining for furnaces and boilers. It can be used in residential, commercial, and industrial applications. However, it is not recommended for use with polyvinyl chloride (PVC) or other plastic pipes as the epoxy can erode the pipe wall over time. It is best to consult with a professional before having your pipes lined in order to get the most accurate and up-to-date information on this process.
Less Maintenance
Unlike traditional pipe replacement methods, which often require the removal of walls and floors to get to the corroded pipes, epoxy pipe lining uses an internal approach. This allows your plumber to simply gain access through existing access points, such as cleanouts. This significantly reduces the amount of time and labor needed for this type of plumbing repair.
Another significant benefit of the epoxy lining process is its versatility. It can be used for a variety of pipe sizes and types, including steel, concrete, PVC, cast iron, and ductile iron. It can also be used for both above-ground and underground piping.
Additionally, this pipe lining technique can be performed in homes with existing appliances. This is not possible with traditional repipes, which typically require the installation of new fixtures and appliances. The pipe lining technology can also be used for hot and cold water recirculating systems, fire sprinklers, and HVAC piping.
Finally, the cured-in-place pipe epoxy is safe to use and meets all NSF (National Sanitation Foundation) standards for potable water. This is a huge advantage over traditional sewer repiping technologies, which can cause bacterial contamination of drinking water. In addition, the epoxy lining process doesn’t release any carbon emissions or leave behind any toxic chemicals that can potentially harm the environment.
The first step of the epoxy lining process involves evaluating your existing pipes to determine whether this method is a good fit for your home. This can be done through sewer camera inspection and by ensuring the pipes are free from damage and in suitable condition to accept an epoxy liner. Once the pipes are deemed eligible for this method of plumbing, they will be cleaned by hydro jetting and then covered with the epoxy lining. The process is relatively quick and can be completed in just a few days.