How to Choose the Right Roof Installation for Your Home

A roof is a home’s first line of defense against blazing sun, pounding rain, and gusty winds. It also protects your belongings, and gives your house its signature style.

Roof Installation

Before the roofing crew begins, they prepare your property by setting up tarps and covering anything not in the open. They will also clear your attic to avoid damage to sentimental items stored there. Visit https://www.ellingsonroofing.com/roofing-missoula-mt to learn more.

Before you begin shingle installation, it is important to acquire the right tools and materials. Moreover, it is critical to choose a clear day to work on the roof. Rain can cause the underlayment and shingles to deteriorate. In addition, it is a good idea to make sure that the gutters are clean and free from clogs. This will help prevent water from backing up under the shingles and causing leaks in the interior of your home.

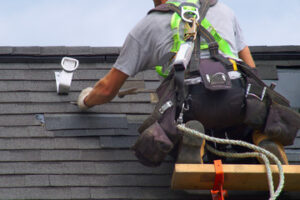
The first course of shingles should be laid directly on top of and flush with the starter strip. Then nail the shingles with four nails per shingle, as instructed by the manufacturer’s package instructions (six nails for high-wind areas). It is also helpful to snap horizontal chalk lines up the roof to ensure that rows are straight. Finally, make sure that you expose 5 in. of the shingle tabs when you nail the first shingle at the valley, and do the same when laying each subsequent row up to the ridge.

If you have a dormer, chimney, skylight or other roof penetrations, it’s a good idea to use flashing materials in conjunction with the shingles. This will protect these difficult-to-reach areas of the roof from moisture and insects.

If you are using metal panels for your roof, it’s a good idea to consult with a roofing professional. These are a bit more complicated to install than asphalt shingles, and it’s important that the seams between panels are properly sealed. In addition, it’s a good idea to apply a layer of waterproof sealant over the panel seams and around any flashing. This will help to prevent moisture from getting into the attic and causing damage to insulation and drywall.

Tiles

When deciding on tile roof installation, you must balance durability, ease of installation and aesthetics. Tile roofs come in a wide variety of colors and styles, from flat tiles to pantiles that interlock. Some tiles are made of natural materials while others are synthetic or composite. Each type of tile has its own advantages and disadvantages. For example, clay tiles are durable and long-lasting but require specialized tools for installation. Composite tiles are made of sustainable mixtures and can mimic the look of any other style of tile roof. They are non-porous, so mildew and mold do not grow, but they can still collect dirt and must be regularly cleaned.

The style of your tiles will also impact your costs. For example, flat tiles are typically made of concrete or clay and cost between $7 and $10 per square foot. Pantile roof tiles are S-shaped and offer a distinctive visual appearance. They are comparatively easy to install and generally cost $8 to $10 per square foot. Other popular tile styles include true barrel tiles, which have a tapered shape and are ideal for curved roofs, and Mediterranean tiles, which have a waved pattern and are best suited to regions that experience heavy rains.

Before laying the tiles, your roofer will apply underlayment to the roof. This will help prevent water from seeping into the roof if the tiles become loose or damaged. It is important to make sure that the underlayment covers all areas of the roof, including ridges and valleys.

Once the underlayment is in place, your roofer will begin laying the tiles. They will usually start at one end of the roof and work across the length. The tiles should overlap by 3 inches minimum, and the installer will nail them into place with roof nails. If you’re using tiles that tightly interlock, it may not be necessary to nail them into sheathing or battens.

Metal Panels

Metal panels are a durable facade option that can be used in place of traditional shingles or tiles on roofs. They are available in a variety of styles, colors, and finishes to complement any architectural style. They are also highly energy efficient and offer excellent fire resistance. Lastly, they are durable and can increase the resale value of a property.

Unlike many other roofing materials, metal panels are made with lightweight steel or aluminum. This makes them easier to handle during installation and reduces the amount of stress on the underlying structure of the building. Additionally, they are often coated with a protective finish that prevents the buildup of debris and dirt.

Before installing metal panel roofs, it is important to install an underlayment. This material will protect the decking of your roof from moisture and water. It is recommended to use a felt or synthetic underlayment that is the same color and gauge as your metal panels.

Once the underlayment is installed, it is time to install the starter lock strips. These strips are placed on the eaves and rakes of your roof to hold the standing seam metal panels in place during construction. It is crucial to install these properly, as they are what keep the roof watertight and protected from strong storms.

A ridge cap is then installed to cover the gap between the panels and the roof ridge. To do this, you will need to snap a chalk line where the ridge of the roof is located and then apply sealant tape to the area. Once the ridge cap is in place, it should lap both sides of the roof evenly.

Downspouts

Downspouts (also known as eavestroughs) are installed on the sides of a roof and collect rainwater. They then channel water into a drain or gutter at the bottom of the roof slope, often with a small ramp to divert the flow and keep it away from the home’s foundation. Downspouts may also drain directly into a storm sewer or other outdoor drainage system.

One of the most important aspects of any good roof is directing rainwater downward rather than overflowing into lower levels of the house. Overflowing gutters create moisture issues that can lead to mold, rot, leaks and even moss growth on the shingles. Gutter downspout extensions, which are long pieces of square tube, solve these problems by guiding watter from upper level gutters downward.

To install a downspout extension, measure from the gutter to the ground and subtract about seven or eight inches to account for elbows at the top and bottom of the downspout. Next, use a hacksaw to cut a long section of downspout. Using metal tin snips, cut the ends of this piece to a 45-degree angle. Finally, crimp the edges with a gutter crimper to ensure a watertight fit.

Screw the downspout extension into place, making sure it’s positioned so that water will be directed away from walkways and areas where pooling might cause an issue. To finish, wrap straps around the downspout, secure them with screws and spray a bit of paint to match your siding’s color. For a more refined look, you can add gutter sealant to the joints. A cordless drill is essential for drilling holes and driving screws. A good quality hacksaw and tin snips are also helpful for cutting downspout sections and elbows to the correct lengths, and you’ll need to have some self-tapping screws for wood or concrete walls.

Valleys

Roof valleys are susceptible to damage and leaks because they are located in the area where two sloping roof sections meet. However, these areas can be protected by regular maintenance and proper roofing materials. The most common roof valleys are open and closed, and both have advantages and disadvantages.

Woven valleys are created by overlapping shingles and provide a more attractive appearance, but they require more material than straight-cut valleys. The extra material cost may be offset by the long-term durability and beauty of woven valleys.

Straight-cut valleys are more efficient than woven valleys because they use fewer materials and are easier to install. They do not offer the same aesthetic appeal as woven valleys, but they are an excellent choice for roofs with minimal slope.

To protect roof valleys, it is important to ensure that they are well-maintained and insulated. For example, roof valleys can be clogged with debris like twigs, dirt, grime, and leaves, which can disrupt water drainage. Regularly cleaning your roof valleys can prevent this problem and help extend the lifespan of your roofing system.

Before installing any roof flashing, it is essential to remove the existing shingles in the area and inspect the sheathing underneath. If you notice any soft or rotted sections, you should replace them with new sheathing. Once you have the new sheathing in place, you can proceed to the next step of your roofing project:

Start by installing a sheet of metal roof flashing on the bottom of the valley. Ensure that it overlaps by at least six inches and seal it with an asphalt sealer. This will add an extra layer of protection against water infiltration.

Reasons to Hire a Roof Repair Professional

A well-maintained roof can last for decades. However, even the most durable materials aren’t infallible. Storms, high winds, and fallen debris can damage or loosen shingles.

Roof Repair

Regular visual inspections and routine maintenance help prevent major problems, but some issues may require prompt repair. The first step is identifying the problem. Look for water stains, wood rot, damp marks on ceilings and walls, and mold in attics. Visit https://www.corpuschristiroofingco.com/ to learn more.

Your roof serves as an important barrier, protecting your home from the elements. Unfortunately, like all protective barriers, it can become worn over time, allowing moisture infiltration that can lead to ceiling leaks and other damage. If you’re noticing damaged shingles, it may be time to get them replaced.

Luckily, this is a job that you can do yourself if you have a streak of DIY in you and the right tools. Replacing a shingle is relatively simple, but if you’re not comfortable working on your roof or your home has a steep pitch, this might be a project better left to the professionals.

When a shingle is damaged, it can leave a gap in your roof’s protection that allows moisture to enter your home and cause significant water damage. Damaged shingles may also lose their granules, which can affect their ability to repel moisture. In addition, if you notice a sagging or uneven roof, this is often a sign of serious structural damage that should be addressed immediately.

Look for signs of shingle damage by inspecting your roof frequently, especially after storms. Inspect for cracks, split seams, and torn or missing shingles. Additionally, if you notice dark spots or streaks on your roof, this is a sign that algae or moss has started growing. This can also damage shingles by limiting their lifespan.

Once you’ve located the shingle that is damaged, remove the surrounding shingles to expose the nails that hold it in place. Loosen the exposed nails with a pry bar, then pull up the damaged shingle and nail in its replacement. Apply a thin coat of roofing cement to the underside of the new shingle to seal it in place.

If you are replacing a large number of shingles, it might be more cost-effective to simply replace the entire area of your roof that has damage. If you’re in this situation, it is a good idea to test all of the surrounding shingles to see which are loose or leaking. Then, you can buy a bundle of shingles in a matching color and complete the replacement process.

Leaking Flashing

Flashing is a crucial part of your roof’s weatherproofing system. It seals the joint where two roof planes meet and runs around chimneys, valleys and corners. Over time, flashing can deteriorate or become damaged. When this happens, it may leak into the home, causing ceiling stains and moisture damage. It’s important to have a professional examine and repair leaking flashing as soon as you notice it, especially if the leak has been going on for a while. Over time, a leaking flashing can lead to rotted framing and sheathing, destroyed insulation, and water and mold in the attic space.

Leaking flashing is most often caused by deteriorated or incorrectly installed flashing. If your flashing was not sealed correctly when it was originally installed, rain and melting snow can seep through the joints and leak into the attic space or into the walls of the house. Flashing is also more likely to deteriorate in climates with high rainfall or snowfall.

Signs of flashing problems can include leaks at chimneys, leaks around vent pipes, and leaks in corners of the house. Look for rusted or corroded flashing, cracks, gaps and loose sections, as well as lifted shingles that are no longer doing their job and allowing water to seep in behind them.

If you suspect that a flashing problem is causing a leak, get on a ladder and inspect the area of the roof where the leak appears in the house. It’s best to do this with a partner, especially if you plan to use a hose on the roof. One person should be inside the house waiting for a drip, and the other can hose down the area of the roof where the leak is occurring. Be sure to use appropriate safety gear, including a sturdy ladder and safety glasses.

If you find a leaky spot in the flashing, it’s possible to make a temporary fix until you can have a professional roofer repair the problem. You can purchase flashing tape that can be used to cover small holes or gaps in the flashing. Be sure to clean the area thoroughly, then apply the tape and make sure it adheres tightly to create a waterproof seal.

Moss and Mildew

Moss and mildew can be a real eye sore for your home, especially when they begin to form thick green mats on your roof. They also tend to hold water on your roof and prevent the sun from drying it, which can lead to further damage, including heaving and cracking. Moss and mildew are usually harmless to humans, but they can eat away at the surface of shingles and cause them to break apart.

To remove moss, find a good moss killer or remover and follow the instructions on the package. Depending on the product, you may have to wait a few weeks for it to kill the moss and begin decomposing on the roof surface. While this is happening, make sure that you continue to inspect and clean your roof regularly to catch moss growth before it spreads.

Then, use a long-handled broom to scrub away the moss from your roof. Be careful not to lift the shingles as you do this. If you have a ladder that is safe to climb on, spray the moss with your garden hose to get it wet. This will help the moss to loosen and be easier to scrub off your roof.

Once you have brushed away as much of the moss as possible, carefully hose down your roof to rinse it off. Be sure to do this in an area that is not directly over any plants or other objects, as the runoff from the moss killing solution can harm them. After you have rinsed the roof, wait for it to dry completely.

If you have a large amount of moss growing on your roof, consider having it professionally cleaned. This will be the best way to ensure that all of the spores are killed and that your roof is free of moss.

There are a variety of commercial moss and mildew cleaners that can be purchased. These products contain special fungicides that target moss, mold, mildew, algae and other biological growth on your roof. Some of these cleaners also contain surfactants that help to loosen and lift unwanted growth. Others include a range of biodegradable ingredients that are designed to slowly decompose unwanted growth on your exterior surfaces.

Missing Shingles

Like a missing puzzle piece, a single missing shingle leaves a gap in your roof’s cover that allows moisture and pests into your home. This is a very serious problem that should be dealt with as quickly as possible.

The good news is that shingles are designed to stand up to a lot of wind, so most shingle losses are due to direct storm damage or age-related wear and tear. However, if a shingle is gone and there are no other obvious causes, it may be time to call in a roofing professional.

A roofing company will be able to determine the source of the shingle loss, and they can also recommend any necessary roof repair services. If you decide to take care of the issue yourself, be sure to practice proper roof safety. Working on your roof without the proper equipment and experience can be dangerous, especially if you are trying to replace a missing shingle in high winds. You could easily fall off of your roof and end up with a bigger problem than the one you’re trying to fix!

To replace a missing shingle, start by using a ladder to climb to the area of your roof where the shingle was removed. Use a pry bar to gently remove the nails holding other functional shingles in place, being careful not to disturb or damage them. Use tin snips to cut new shingles to the correct length, then carefully place them over the space where the old shingle was. Secure the shingles with your nail gun and caulk around the edges of your roof to ensure that water will not get into your home if the shingle fails.

You should also check the rest of your roof for any other signs that it’s time for repairs, such as stains on your walls or ceilings. These are often the first sign of a leaky roof, and they can lead to mold and more structural problems in your home.

The Importance of Roofing Maintenance

A roof is your home’s first line of defense against the elements. Routine maintenance helps prevent leaks and other damage.

Inspect for shingles that are loose, lifting, curling or peeling. Also look for moss or algae growth. Make sure there are no debris pile ups that could cause obstructions in drain flow and ponding water. For professional help, contact North Port FL Roofing.

Roofing

1. Inspect the Gutters

Gutters serve a crucial function: they help to safely redirect water runoff away from the roof and home structure. Gutters that are clogged or not performing their functions can lead to costly moisture damage to the roof, fascia, siding, foundation and yard of the home. This is why gutter inspections and maintenance are so important.

Residential roofing experts recommend cleaning out your gutters twice a year (in spring and fall) as part of a thorough roof maintenance checklist. Use a hose to flush out the debris in the gutter and watch for water exiting the downspouts freely. If it doesn’t, take the time to unclog the downspout. If you’re comfortable using a ladder, enlist a spotter and follow all common-sense safety measures when working up high.

When inspecting your gutters, pay close attention to the flashing, which is a layer of metal or plastic that seals around vents and chimneys as well as joints in the roof. Look for cracks, gaps, rust or wear which can indicate the flashing is no longer watertight and needs to be replaced. Also, look for water stains in the attic or along walls adjacent to roof structures, which can indicate a leak.

Lastly, check the gutters for proper attachment to the roof. Loose gutters can pull away from the roof during heavy storms and create additional damage to the roofing system and other areas of the home. This is particularly true of older gutters that are built into the roof structure (cornice or hidden gutters) or hung gutters (Yankee gutters). Inspect the gutters and downspouts for loose spikes or hangers and resecure them if necessary. In addition, reposition the hangers or spikes to increase the slope of the gutters toward the downspouts.

2. Inspect the Soffits

The roof eaves, including the soffit and fascia boards, are another important element of a healthy roof. They protect rafters and beams from water damage, as well as shield the attic and upper floors of a building from moisture build-up. A roofing professional will inspect soffit and fascia boards for damage and make sure they’re functioning properly.

The soffit is the board that covers the underside of a roof overhang, while fascia is a wood or metal sheet that runs along the edge of a wall and the top of a house’s gutters. An inspector will check for rot, cracks, warping and other types of damage. He will also examine the drip edges, which are strips of metal that direct water away from the fascia boards.

When a soffit or fascia is damaged, it can allow moisture to penetrate the structure, leading to mold, mildew and other interior problems. This can also cause leaks in the attic and upper floors of a home. A regular inspection of these areas can catch problems and stop them from becoming more serious, preventing costly repair work down the line.

In addition to checking for rot and other damage, an inspector will look at the soffit vents to make sure they are clear of debris and functioning properly. He will also check for rust or cracked flashing, which lines penetrations, such as skylights, chimneys, vent pipes and more. A faulty flashing can lead to leaks, so it’s important to replace or repair it as soon as possible. A roofing professional will also check the soffit, fascia and penetrations for signs of pest intrusion and to ensure that they’re properly sealed.

3. Inspect the Flashing

Often overlooked, flashing is critical to the integrity of your roof. It seals the areas where your roof meets other parts of your home, like chimneys, skylights and vents, as well as joints between sections of your roof. If you find a gap or area of deterioration in your flashing, it’s important to repair it promptly. Otherwise, you may experience water penetration, causing ceiling and wall damage.

Flashing is available in a variety of styles and materials, each designed for specific purposes. For example, step flashing is used to seal the gaps between the shingles and vertical walls. You will also find it at the bases of roof penetrations like chimneys and dormers. Another type of flashing is called apron flashing. This is L-shaped and installed under each shingle as it butts up against the vertical face of a wall.

You should check your flashing every time you perform a roof inspection. This includes after storms and major weather events. Look for signs of rust or missing flashing at the points of roof protrusions, like chimneys, skylights and ventilation. Also, check for flashing around the valleys of your roof where two slopes meet. These are high risk areas for leaks.

You should also inspect the attic and walls adjacent to the roof for signs of moisture, mold and discoloration. In addition, during rainy seasons, listen for the sound of dripping in the attic or walls, which can indicate poor flashing. Finally, if you find a problem with the flashing, make sure that it is repaired by an experienced roofing contractor. This is a small investment that will help protect your home from expensive problems down the road.

4. Inspect the Shingles

It’s important to inspect the shingles because these are the first things to show signs of damage and wear. A visual inspection is necessary, as well as a touch test to feel for subtle damage like cracks and chips. Damaged shingles should be replaced immediately to prevent water from entering the roof structure and leading to further problems. A shingle that has been cupped (the edges are higher than the center) or is curled can also allow water to seep underneath, causing additional damage to the underlayment and roof decking.

Dark spots or streaks on the shingles may indicate moss or algae growth. While this does not directly damage the shingles, it can trap moisture that can weaken and damage them over time.

Cracked shingles are often the result of extreme weather conditions and can lead to leaks and further damage if not addressed. Blistering shingles are another sign of deterioration and should be replaced as soon as possible to avoid further damage.

Check the flashing around chimneys, vents, skylights, dormers and other structures on the roof for gaps or rust that could allow water in. It is also a good idea to inspect the flashing around these areas after heavy rains to ensure that it is sealing water out effectively.

A final important thing to note is that it is always a good idea to examine the interior of the building for signs of water damage, such as mold and mildew, drips and leaks, and peeling paint. This can be caused by moisture buildup under the shingles and is an indication that it is time for a professional assessment and replacement. This is particularly true in areas that are prone to heavy snows and hurricanes.

5. Inspect the Flashing

Flashing is sheet metal fabricated to a specific shape and designed to prevent water intrusion into the roof system. It is used in areas of the roof that are more likely to leak and carries moisture away from the intersections of walls and the roof, as well as around roof openings like chimneys and skylights.

Over time, flashing can corrode or dislodge. When this occurs, the roof covering may fail and moisture penetration into the building may occur. It is important to inspect the flashing regularly and to ensure it is properly secured and sealed.

Inspecting the flashing can be a difficult task, as it is often located in inaccessible places. It is essential to have a ladder large enough to reach these areas and be comfortable climbing on the roof. It is also a good idea to wear gloves and safety goggles.

A roof inspection is an opportunity to look for signs of damage, especially rust and corrosion in the area of the flashing that meets other roofing materials or roof protrusions. A common cause of leaks is faulty flashing, and it is important to repair any issues identified during the inspection.

When extensive damage or deterioration is observed, it is recommended to consult professional roofers for a thorough assessment and recommendations for comprehensive repairs. Regular roof maintenance can help to prevent leaks and other costly problems, such as structural and mold damage. A good roofer will be able to spot problems early, and provide timely repairs. This will save you money in the long run, and protect your home’s investment.

Preparing for Roofing Installation

Before roofing can begin, the crew will set up protective measures on your property. Tarps are placed over any belongings, and vehicles are moved to a different area so that roofing debris doesn’t damage them or anything else.

Roofing

The roofer will then lay an underlayment, which is a felt material that protects sheathing and framing should water penetrate the roof covering. This is nailed down close to the drip edge and then rolled out toward the ridge. Contact Lexington Roof Company for professional help.

The roof over your head is more than just a shelter from the elements; it’s a design element that communicates the style, personality and character of your home. The selection of roofing materials is one of the most important decisions homeowners, contractors and DIYers will make. There are many factors to consider, including durability, maintenance requirements, energy efficiency and aesthetic compatibility with your home’s architectural style.

The choice of roofing materials should also align with the climate in your area; a material that performs well in hot, dry areas may not do so well in cold, wet regions. Additionally, the cost of each material should factor into your decision, considering how much you’re willing to spend on a new roof as well as future costs associated with energy bills, maintenance and repairs.

Asphalt shingles are a popular roofing option because of their affordability and ease of installation. They are available in a variety of colors, styles and sizes to suit your taste. Other popular roofing options include metal roofs, which are typically heavier than shingle roofs and require more extensive framing, as well as wood shakes, which have a natural appearance that can complement rustic or historical homes.

Rolled roofing is another economical roofing option for low-slope roofs. This type of roofing consists of long rolls of mineral-impregnated and asphalt-impregnated material topped with granules. It is often used on sheds and other utilitarian structures, but can be used on residential roofs as well.

Clay tile roofs are a beautiful and durable option for residential and commercial buildings. They are molded and fired into shape, then placed over a roof frame and secured. Other roofing options include copper roofs, which are highly durable and can add a striking aesthetic to your home, as well as stone-coated steel roofs, which are expensive but provide superior protection from wind and rain.

In addition to the roofing materials themselves, you’ll need a sturdy ladder that can reach the roof as well as a receptacle for the disposal of old materials. The receptacle should be large enough to accommodate the quantity of debris that will likely be produced during the tear-off process.

Preparation

If you’re not comfortable with climbing a ladder and installing shingles yourself, it’s best to hire professionals. But even top-quality roofing contractors will need some preparation from their customers to help ensure the job goes smoothly.

The first step in the roof installation process is tearing off your old roof. The hammering, scraping and nailing involved causes vibrations that can shake or knock down anything hanging on your walls, so it’s a good idea to take down mirrors, pictures, wreaths and loose shelving ahead of time. If you have expensive or fragile items that can’t be removed, wrap them in blankets and bubble wrap for extra protection. This is also a good time to back up computer files and move valuables away from the area.

Once the old roof is removed, the roofing team can start prepping the surface for a new layer of shingles. This includes removing or relocating satellite/TV dishes, skylights and solar panels, and covering the ground around the house with tarps to protect landscaping, cars, patio furniture and other items that could be damaged by falling shingle debris.

Depending on the size of your roof, this prep phase can take up to two days. The crew will also install flashing at the chimney, window, dormers and other areas to keep water from leaking into your home. If you have a metal roof, they’ll also install specialty materials to reinforce the ridge cap and seal it against rain, snow and hail.

The shingle installation is the most visible part of the roofing project. Top-tier roofing contractors will install the shingles with precision so they look beautiful and keep your home protected from water damage.

The shingle installation is noisy, dusty and disruptive, so it’s a good idea for pets and children to stay elsewhere during this time. Young children won’t be able to sleep, and older kids may get frustrated or distract the roofers. Have them stay at Grandma’s or ask a friend for the day, and make sure they wear shoes and don’t wander into the work area.

Installation

Once the contractor arrives to start the re-roofing process, they will cover sensitive areas of your yard and home with tarps and take steps to protect your property from debris. They will also have a dumpster delivered, and use wooden boards to protect things like your garden and air conditioning unit from the debris.

The first step will be removing your old roof. The contractor will then clean the underlayment and install drip edge flashing. This is used to prevent water leaks at the eaves, roof valleys, and in certain other leak-prone areas. They will also add ridge vents to allow for proper attic ventilation. This helps keep your attic cool and dry, regulates the temperature of your home, and reduces energy costs.

They will then lay your new shingles. The shingles are secured with an underlayment, and the edges of the shingle are sealed with roofing cement. They will also add ridge vents, soffit vents, and/or chimney vents to provide proper attic ventilation. These help to keep your attic dry and regulated, which in turn protects the roof deck and insulation. These also improve your home’s resale value and overall comfort. They will then finish off the project by cleaning up any messes they made, and blowing off your gutters and downspouts to remove any remaining debris.

Final Inspection

The final inspection is a vital step before a project is deemed complete. It serves as a validation of quality and safety, and enables businesses to detect errors or non-compliance early on. It also promotes accountability and prevents disputes over who should take responsibility for a particular issue.

Using a well-defined checklist during the process helps to streamline workflow and ensures that all aspects of a product or service meet required standards. However, to maximize the effectiveness of a final inspection checklist, it is essential to carefully map your production or service process and to integrate the checklist into it. This will help to minimize confusion and eliminate miscommunications, resulting in an efficient, effective, and reliable production or service delivery.

When creating a final inspection checklist, it’s important to keep in mind that it should be updated regularly, considering changes in industry regulations and feedback from the inspection team. This will help to maintain its effectiveness, ensuring that it’s consistently used and respected by all teams.

One common mistake that many teams make is failing to properly train their team on how to use the checklist. This can lead to inconsistencies and poor inspections, which in turn will have a negative impact on the project’s outcome. To avoid this, it’s recommended to provide regular training sessions and assessments on how to effectively use the checklist.

Another mistake that many companies make is waiting until the last minute to schedule a final inspection with local building authorities. This can cause issues, such as a building’s final construction not matching the approved plans, which can delay a certificate of occupancy (CO).

It’s also advisable to plan the inspection well in advance, especially when working with local government agencies that have limited capacity and busy schedules. This will reduce the risk of scheduling conflicts and allow you to pass your final inspection without any delays. Lastly, it’s crucial to remember that a final inspection is a comprehensive evaluation of all aspects of the finished product. It can include everything from minor issues like a lack of signage to more serious concerns like soil settling that could affect the foundation.